
How to Install a GFCI Outlet – Step-by-Step Guide
Disclosure: Plumbing and Electrical Help is a participant in the Amazon Associates Program, an affiliate advertising program designed to provide a means for sites to earn advertising fees by linking to Amazon.
Introduction
GFCI (Ground Fault Circuit Interrupter) outlets are required by code in areas where water is present — kitchens, bathrooms, garages, and outdoor spaces. These special outlets detect imbalances in electrical flow and cut power in a fraction of a second, protecting you from dangerous shocks. If you’re adding an outlet in a wet area or replacing an old GFCI, here’s how to do it safely.
Related: For troubleshooting dead outlets, see our Outlet Not Working? Try This First guide.
Why GFCI Outlets Matter
GFCI outlets protect you from electrical shocks by monitoring the current flowing through the hot and neutral wires. If even a small amount of electricity “leaks” (say, through a person touching a live wire), the GFCI trips instantly — often before you even feel a shock.
They’re required in:
- Kitchens (within 6 feet of a sink)
- Bathrooms
- Laundry rooms
- Garages
- Outdoor areas
- Crawl spaces
- Basements
What You’ll Need
- GFCI Outlet — about $10-15
- Voltage Tester — to verify power is off
- Flathead Screwdriver
- Phillips Screwdriver
- Wire Strippers — if needed
- Electrical Tape — optional
Check Current Price on Amazon – GFCI Outlet
Check Current Price on Amazon – Voltage Tester
Check Current Price on Amazon – Screwdriver Set
Step 1: Turn Off the Power
This is critical. Go to your breaker panel and turn off the circuit you’ll be working on. Use your voltage tester to confirm the power is off — test it on a known live outlet first to make sure the tester works.
Step 2: Remove the Old Outlet
Remove the faceplate and the screws holding the outlet to the box. Pull the outlet out and note how the wires are connected:
- Black (hot) wire → brass screw
- White (neutral) wire → silver screw
- Green/bare (ground) wire → green screw
Take a photo before disconnecting anything — it helps when wiring the new outlet.
Step 3: Understand GFCI Wiring
GFCI outlets have two sets of screws:
- “Line” screws — power coming FROM the breaker
- “Load” screws — power going TO other outlets downstream
If this is the only outlet on the circuit, you’ll only use the Line screws.
Step 4: Connect the Wires
Connect the wires to the appropriate screws:
- Black wire → brass “Line” screw
- White wire → silver “Line” screw
- Ground wire → green screw
Wrap the wires around the screw terminals (clockwise) for a secure connection. Don’t use backstab connections on a GFCI — they’re not as reliable.
Step 5: Install the Outlet
Carefully fold the wires into the box and push the outlet in. Secure with screws and attach the faceplate.
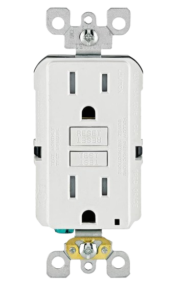
Step 6: Test the GFCI
Turn the breaker back on. Press the “TEST” button — the outlet should trip and the “RESET” button should pop out. Press “RESET” to restore power.
If it doesn’t trip when testing, the GFCI is defective — replace it.
Understanding “Line” vs “Load”
This confuses many DIYers:
- Line = power coming FROM the breaker (your supply)
- Load = power going TO other outlets (downstream)
If you only have one outlet, just use Line. If other outlets lose power when you trip the GFCI, those are on the load side — connect them to the load screws.
For more on troubleshooting outlets, see our guide on Outlet Not Working? Try This First.
Common Mistakes to Avoid
❌ Forgetting to turn off the breaker (always verify with a tester!)
❌ Connecting to “Load” when you should use “Line”
❌ Not connecting the ground wire (it’s required for safety)
❌ Using backstab connections (screw terminals are more reliable)
❌ Not testing the GFCI after installation
✅ Always turn off power and verify with a voltage tester
✅ Take a photo of wiring before disconnecting
✅ Use screw terminals, not backstabs
✅ Test the GFCI after installation
When to Call an Electrician
Call a pro if:
- The box is too shallow for a GFCI (they’re deeper than regular outlets)
- You have aluminum wiring (requires special treatment)
- The wires are damaged or too short
- You’re not comfortable working with electricity
- The circuit keeps tripping after installation
Our guide on [Why My Circuit Breaker Keeps Tripping](/why-my-circuit-breaker-keeps-tripping/) can help diagnose ongoing issues.
Final Verdict
Installing a GFCI outlet is a straightforward DIY project that provides crucial safety protection. With a few basic tools and careful attention to wiring, you can complete this in 20-30 minutes. Don’t skip this safety upgrade in wet areas — the protection they provide could save your life.
Pro Tip: Label the GFCI outlet in your electrical panel so you know which breaker controls it.
Related Articles You’ll Want to Read:
- Outlet Not Working? Try This First — Troubleshooting dead outlets
- Why My Circuit Breaker Keeps Tripping — Diagnose electrical problems
- How to Change a Light Switch — More DIY electrical